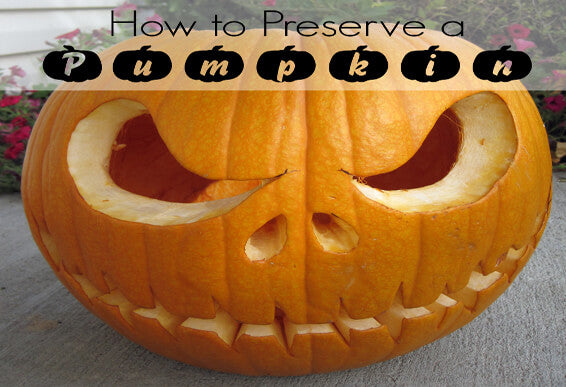
How to Preserve a Pumpkin

It's that time of year again. Halloween is right around the corner. Sometimes in the excitement, we can carve our pumpkins pretty early. This is one of the great traditions of Halloween, but sometimes it means that our pumpkins won't look as fresh by the time the 31st rolls around.
Choosing the Right Pumpkin for Carving
Steve Reiners, a horticulturist at Cornell University, says to find a pumpkin with a firm stem. A weak stem is an indication of poor health and rotting might already be underway. Once you start carving, try to leave the stem on since it gives the pumpkins nutrients and keeps it orange-er for a few more days.
It seems that how well your pumpkin fares has a lot to do with what pumpkin you choose. One of the pumpkins I purchased did not fare so well in the lid. The stem had been weak and flimsy, which meant that some rotting was already underway (unbeknownst to me at the time). Cutting the top off probably saved the rest of it spreading to the rest of the pumpkin. The lid had massive rot despite some preservation attempts on my part.
Do These Pumpkin Keeping Methods Actually Work?
With the variety of methods parading around on the Internet, it's hard to know which one works. On MyScienceProject.org, they ran an experiment with carved pumpkins using various preservation methods. These pumpkins were kept inside at 62 to 64 degrees Fahrenheit, and observations were recorded for a period of 14 days. All pumpkins averaged about 2.5 pounds and were of similar thickness. Photo credits go to MyScienceProject.org.
White Glue

White liquid glue was used to coat the inside of the pumpkin. The idea is that the glue will seal the pumpkin and protects it from dehydration, rotting, and oxidation. How does this pumpkin stand up? After 48 hours, the glue pumpkin is exhibiting signs of mold and is already softening. Days four and five passed by uneventfully, but day six yielded a pumpkin that had severely softened and abundant mold spots. The next day, the glue pumpkin was tossed.
Vaseline

They coated the inside of the pumpkin and carved areas with petroleum jelly. This is intended to have the same effect as the glue by hydrating it and then protecting it. Like before, mold starts to grow after just 48 hours. By day six had one small patch of mold, and then in the next two days, that patch grew rather large. The Vaseline pumpkin was tossed out on day 10 since the structural integrity had been compromised and it was rotting badly.
Bleach

This pumpkin was soaked in bleach (1 tsp. bleach per gallon of water) for a few hours after it had been carved. This process has a twofold result: the soaking hydrates the pumpkin and the bleach is an antimicrobial. This was the only pumpkin that still looked good and was mold-free. The bleach pumpkin maintained its appearance for the next few days. While it didn't develop mold on day eight, there were slimy patches and a soft spot on the bottom of the pumpkin. Despite this, the bleach pumpkin had maintained its appearance. It was finally tossed out on day 11.
Note: After soaking the pumpkin, take off the lid and invert the pumpkin to let it dry.
Acrylic Spray

The acrylic spray is another idea looming around the internet mill. This carved pumpkin was sprayed with an acrylic spray to seal and protect the pumpkin. Like the other pumpkins, the acrylic pumpkin developed mold after two days, which quickly progressed to large mold patches on day eight. It was disposed of the next day.
Pumpkin Fresh

Pumpkin Fresh is a biodegradable spray used to preserve the pumpkin from mold, rot, and decay. Even after five days this pumpkin still looked good and was on par with the bleach pumpkin for outside appearance, although its edges were a little drier. On day eight the pumpkin had only a few spots of mold. After 14 days this pumpkin had minimal mold on the inside. You would still toss this pumpkin after this amount of time, but it did well. A 4 oz bottle of pumpkin fresh lasts about a day
Note: After soaking the pumpkin, take off the lid and invert the pumpkin to let it dry out.
All-Natural Pumpkin

This is pumpkin au naturel. Nothing has been added. Surprisingly this pumpkin was tied with the Pumpkin Fresh pumpkin (confusing huh) for how well it did. It developed a few spots of mold within the first few days but held up until about day 14 when it was then disposed of.
Diatomaceous Earth Pumpkin

This pumpkin also lasted two weeks, and this experiment was conducted by us. Diatomaceous earth was coated on the inside of the pumpkin and on the lid. DE kept it dry and pretty much mold-free. The pumpkin started going soft around day five. The lid started to cave early, but this may have been due to the pumpkin itself rather than the DE. The stem was soft which is an indication of poor health. By day 14, the pumpkin flesh was too soft and was thrown out at that point.
There are some clear winners here and some questionable preservation practices. Leaving your pumpkin alone is almost better than using some of the products out there. Dusting it with DE or using the Pumpkin Fresh spray reduced the mold. Bleach was the only preservative capable of retaining the shape of the pumpkin since it hydrated the flesh as well. The only problem with this method is the pumpkin can't be composted after soaking it in bleach. All other practices receive an anti-recommendation and don't seem to help at all.
Alternatives to Carving
Sometimes the best route to go is to not carve at all. There are some fun ways to decorate that don't include a carving knife.

This one is another fake pumpkin. Picture and design are from TheKimSixFix.com.

You can just paint a pumpkin, ensuring that it lasts a long time and looks lovely. Check out the Lollyjane.com blog for 33 different ways to paint your pumpkin.

These are viable alternatives and a great way to have your pumpkins throughout the whole month instead of just looking at their best for a few days.
Before you go, check out some of these fun facts about jack-o'-lanterns:
- The tradition of making jack-o'-lanterns for Halloween has spanned for centuries.
- This practice stemmed from an Irish myth about a man "Stingy Jack". The myth goes that Stingy Jack invited the Devil for a drink and afterward didn't want to pay for their drink. He somehow convinced the Devil to turn into a coin so he could pay for their drinks. Instead of paying for the drinks, Stingy Jack kept the money in his pocket next to a silver cross. This kept the Devil at bay. Eventually, he set the Devil free under the conditions that he couldn't bother Stingy Jack for one year, and if he died the Devil couldn't claim his soul. Stingy Jack tricked the Devil after a year by carving a cross into a tree he had tricked the Devil into climbing. The next agreement was for 10 years. Stingy Jack died and was not allowed into heaven (as per their agreement) or hell. The Devil sent Jack to walk the earth with only a lump of burning coal. Jack then put the coal in a carved-out turnip.
- Originally jack-o'-lanterns were carved from turnips, potatoes, or beets.
- Irish immigrants brought this tradition of carving jack-o'-lanterns to America. Pumpkins became more popular to use because of their popularity in the United States.
- Pumpkins come in over 50 varieties, with the Atlantic Giant growing up to 100 pounds. (With most of that being water weight since they're 90 percent water.)